
Disclosure: This post contains affiliate links. If you purchase through these links, I may earn a small commission at no extra cost to you. Thank you for supporting my blog! 💕
Spring is a season of renewal, a time when the world outside awakens with vibrant colors and fresh life. For many of us, this natural transition inspires a parallel desire to refresh our interior living spaces. While expensive gallery pieces are often out of reach for the budget-conscious decorator, the rise of the Bohemian or “Boho” aesthetic has paved the way for accessible, handmade alternatives. One of the most striking ways to bring warmth, texture, and a modern edge to your home is through the creation of abstract geometric wood art. This specific style blends the rustic charm of natural timber with the precision of mathematical patterns, resulting in a piece that is both timeless and contemporary.
As we transition into the warmer months, incorporating light wood tones, pastel accents, and intricate patterns can transform a stale room into a sanctuary. The beauty of this project lies in its versatility. Whether you are a seasoned woodworker with a full workshop or a novice looking to try your hand at your first DIY, the process is incredibly rewarding. You aren’t just making a decoration; you are creating a focal point that tells a story of craftsmanship and personal style. In this comprehensive guide, we will explore everything you need to know about crafting these wood art pieces that capture the essence of spring. We will delve into wood selection, design theory, and assembly techniques to ensure your final product looks professional and high-end without the hefty price tag. By understanding the balance between shape and material, you can elevate your interior design to a professional level while staying within a modest budget.
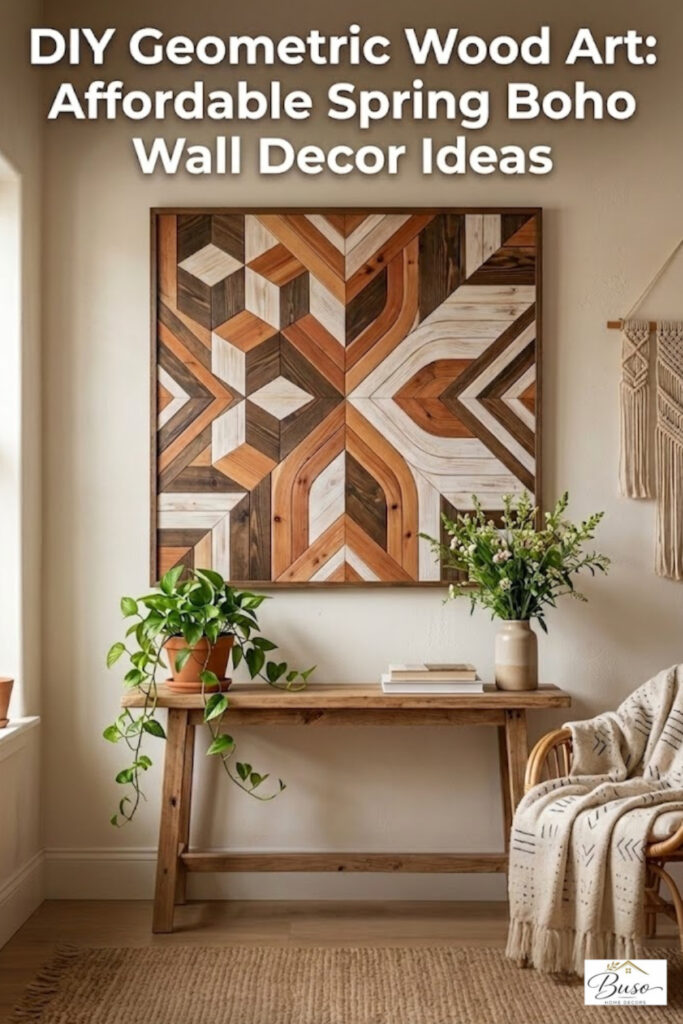
Essential Materials for Your DIY Projects
When embarking on the journey to create the best wood art for your home, the first step is selecting the right materials. The foundation of any great geometric piece is the quality and type of wood used. For a boho-inspired look, softwoods like pine or cedar are popular choices because they are affordable, easy to cut, and possess a natural grain that reacts beautifully to stains. However, if you are looking for a more refined finish, hardwoods like oak or walnut offer a density and richness that is hard to beat. You will also need a backing board, typically a piece of 1/4-inch or 1/2-inch plywood, which serves as the canvas for your geometric layout.
Beyond the timber itself, you’ll need a set of reliable tools. A miter saw is the most critical instrument in your arsenal, as it allows for the precise angled cuts necessary for intricate triangles and chevrons. A table saw or circular saw can help with ripping long strips of wood to a uniform width. For assembly, high-quality wood glue is essential, along with a brad nailer for extra security. Sanding is another crucial phase; you’ll want various grits of sandpaper (from 80 up to 220) to ensure a smooth, splinter-free surface. Finally, consider your finishing products. Water-based stains are excellent for a modern look, while oil-based stains provide a deeper, more traditional glow. These wood art projects thrive on the contrast between different wood species and stain shades, so don’t be afraid to mix and match to find the look that fits your aesthetic. Having everything prepped before you begin ensures a smoother workflow and a more enjoyable creative experience.
Designing Your Geometric Pattern
The design phase is where your abstract geometric wood art truly begins to take shape. Geometric art is rooted in symmetry, repetition, and the clever use of negative space. Before you make your first cut, it is vital to sketch out your pattern on paper or using digital software like SketchUp or Illustrator. Popular motifs for spring boho decor include mountain ranges, sunbursts, and chevron patterns. These designs evoke a sense of the outdoors and natural harmony, which aligns perfectly with the seasonal theme.
When planning your layout, think about the scale of the piece relative to your wall space. A large-format piece can serve as a headboard alternative or a statement over a sofa, while smaller sets of three can create a cohesive gallery feel. Remember to account for the thickness of the wood strips you are using. Usually, strips between 1 and 2 inches wide provide the best balance of detail and ease of handling. The beauty of these wood art creations is that they don’t have to be perfectly symmetrical to be aesthetically pleasing. Asymmetrical designs can create a sense of movement and energy that draws the eye across the room. Consider how the wood grain direction will interact with your pattern; by alternating the grain horizontally and vertically, you can create a 3D effect even with flat wood pieces. This stage is your chance to be an artist, so take your time and experiment with different shapes until the composition feels just right. A well-planned design is the secret to a professional-looking result.
Cutting and Assembling Your Masterpiece
Once your design is finalized and your materials are prepped, it’s time to move into the assembly phase. This is the stage where you see your beautiful wood art come to life. Start by cutting your backing board to the final dimensions of your frame. It’s often helpful to draw your pattern directly onto the plywood with a pencil as a guide. When cutting the individual wood strips, accuracy is key. Even a fraction of a degree off on your miter saw can lead to gaps in your pattern as you move further from the center. Always do a “dry fit” of your pieces before applying any glue. This allows you to check the joints and make minor adjustments with a sander if needed.
When you are ready to attach the pieces, apply a thin, even layer of wood glue to the back of each strip. Avoid using too much glue, as squeeze-out can be difficult to clean and may interfere with how the wood takes the stain later. Press the piece firmly onto the backing board and, if possible, use a few brad nails to hold it in place while the glue sets. Work from the center of the design outwards to ensure that any cumulative errors are pushed to the edges where they can be trimmed off. After the glue has cured completely, you can trim any overhanging edges with a saw to get a perfectly flush border. This meticulous process is what separates hobbyist crafts from the best wood art available on the market. The satisfaction of seeing the gaps close and the pattern lock together is unparalleled, giving you a sense of accomplishment as your vision turns into a physical object.
Choosing the Perfect Color Palette
The color palette you choose for your abstract geometric wood art will define its mood and how well it fits into your spring decor. For a boho look, you generally want to stick to earthy, organic tones. Think of muted terracottas, sage greens, creamy whites, and varying shades of natural wood. If you prefer a more minimalist approach, using a monochromatic scale of different wood stains can create a sophisticated and subtle texture. Light oak stains paired with dark walnut accents create a classic high-contrast look that highlights the geometric precision of the piece.
To achieve these wood art finishes, you can use traditional wood stains, but don’t overlook the potential of “whitewashing” or using diluted acrylic paints. Whitewashing involves thinning out white paint with water and wiping it over the wood, allowing the grain to show through while brightening the overall tone, perfect for a light and airy spring vibe. You can also experiment with “ebonizing” wood using a mixture of steel wool and vinegar to create a weathered, grey-black look. Whatever you choose, always test your stains on scrap pieces of the same wood first. Different woods absorb pigment differently, and you don’t want any surprises on your final masterpiece. Finishing with a matte or satin polyurethane will protect the wood and give it a professional sheen without making it look overly “plastic.” This attention to color and finish ensures you have a perfect wood art piece that complements your existing furniture and textiles while remaining a durable fixture in your home.
Styling Your Art for a Spring Refresh
Styling your new creation is the final step in your spring home refresh. Beautiful wood art deserves a place of honor where it can be appreciated from multiple angles. In a boho-themed room, these pieces work exceptionally well when paired with other natural elements. Consider hanging your geometric art above a console table adorned with potted succulents, woven baskets, and linen runners. The warmth of the wood acts as a bridge between the structural elements of the room and the soft, organic textures of indoor plants.
Lighting also plays a massive role in how your wood creations are perceived. Since these pieces often have varying depths and grain directions, directional lighting can cast subtle shadows that emphasize the 3D nature of the work. A set of picture lights or adjustable track lighting can make the patterns “pop” in the evening. If you’ve created a smaller series of wood art, try hanging them in a vertical or horizontal line to elongate the space. For a more eclectic look, mix your wood art with framed botanical prints or macramé wall hangings. The goal is to create a layered, “collected” look that feels personal and lived-in. Because wood is a neutral material, it can adapt to changing seasonal decor; in the summer, you might pair it with bright blues and yellows, while in the winter, deep evergreens and metallics would work beautifully. By rotating the surrounding accessories, you can keep the room feeling fresh all year long.
Elevating Your Craft with Advanced Textures
For those who have mastered the basics and want to take their craft further, there are several advanced techniques to consider. One way to elevate these wood art projects is by incorporating different thicknesses of wood. By using strips that range from 1/4 inch to 3/4 inch, you create a literal 3D topography on your wall. This adds a level of sophistication and complexity that is often found in high-end art galleries. Another technique is “shou sugi ban,” the Japanese art of charring wood. By lightly burning the surface with a torch before staining, you can highlight the grain in a dramatic way that provides a stunning contrast to uncharred pieces.
You might also consider integrating other materials into your perfect wood art. Strips of polished brass or copper can be inlaid between the wood pieces to add a touch of modern luxury. Even something as simple as incorporating a mirror fragment into the center of a sunburst pattern can transform the piece into a functional work of art. Finally, think about the frame. A “floating frame” style, where the art appears to hover within a thin outer border, provides a very modern and clean finish. As you experiment with these advanced methods, you will find that the possibilities for the best wood art are truly endless. Each project is an opportunity to refine your skills and explore new aesthetic territories, ensuring your home remains a unique reflection of your creative journey. The more you practice, the more you will develop a signature style that stands out.
Frequently Asked Questions
What is the best wood for beginners making geometric art?
Pine is the best choice for beginners. It is inexpensive, readily available at most hardware stores, and soft enough to cut and sand easily. It also takes stain well, allowing for a variety of finishes.
Do I need a miter saw to create this type of art?
While it is possible to use a hand miter box, a power miter saw is highly recommended for accuracy. Precise angles are the key to a professional-looking geometric pattern where all the pieces fit together seamlessly.
How do I hang a heavy wood art piece safely?
For larger, heavier pieces, use a French cleat system. This allows the weight to be distributed evenly across wall studs. For smaller pieces, heavy-duty D-rings and picture wire are usually sufficient.
Can I use scrap wood for these projects?
Absolutely! Using scrap wood is a great way to make these wood art pieces even more affordable and sustainable. Just ensure all your scraps are planed to the same thickness if you want a flat surface, or mix thicknesses for a 3D effect.
Final Thoughts
Creating your own abstract geometric wood art is a journey that combines the precision of geometry with the warmth of natural materials. It is an affordable way to bring a high-end, boho-inspired aesthetic into your home just in time for the spring season. Throughout this guide, we have explored the essential steps, from selecting the right timber and designing intricate patterns to the final touches of staining and styling. These wood art pieces are more than just wall decor; they are a testament to the beauty of handmade craftsmanship.
Whether you choose to go with a simple mountain motif or a complex 3D topography, the result will be a stunning focal point that breathes new life into your living space. The versatility of wood allows it to blend seamlessly with any color palette, making it the perfect addition to a spring refresh. So, gather your tools, pick out some beautiful wood, and start creating. You’ll find that the process of building the perfect wood art is just as satisfying as seeing it hanging on your wall for years to come. Your home deserves a touch of artisanal flair, and there is no better way to achieve it than with a piece you built with your own two hands.
📌 Found this helpful? Save this pin to your Pinterest boards so you can refer back to it later!